Fail2ban is an open source security utility, which scans log files for certain patterns and bans IPs when malicious activity is encountered. This could be used to protect WordPress from bruteforce attacks, pingback attacks and more. In this tutorial we’ll look at installing fail2ban on a DigitalOcean server and configuring it to secure WordPress.
Note: If you use Sail CLI to provision and deploy WordPress to DigitalOcean, fail2ban is already installed and configured.
Installing fail2ban
On many Linux-based systems provided by platforms like DigitalOcean, fail2ban is already installed out of the box. If it is not, however, you could use system’s package manager to install it. For example on Debian/Ubuntu based systems run:
apt update
apt install fail2ban
The service will start automatically once the installation is complete. It could also come pre-configured to protect some system services, such as SSHd. We’ll need a few extra steps to make sure it’s also protecting our WordPress install.
Configuring fail2ban
There are a few key concepts in fail2ban, which you should be familiar with: filters, actions and jails. These should not be confused with WordPress actions and filters.
Filters in fail2ban are search patterns. These are the expressions which the fail2ban service will match against when reading log files. Actions are commands for fail2ban to run, when a certain filter has been matched over a specific threshold. Jails are configuration directives that combine these filters and actions together.
Filters
For our WordPress configuration we’ll have two filters. The wordpress-auth.conf filter will scan for authentication failures. This filter goes to /etc/fail2ban/filter.d/wordpress-auth.conf with the following contents:
[Definition]
failregex = wp-login-failed:<HOST>
Similarly, wordpress-pingback.conf will look for potential pingback attacks. This filter goes to /etc/fail2ban/filter.d/wordpress-pingback.conf with the following lines:
[Definition]
failregex = wp-pingback:<HOST>
As you may have noticed, there’s nothing special about the search expression in these two filters. We’re simply looking for the strings “wp-login-failed” and “wp-pingback” respectively, and matching the visitor’s IP address. These strings will come from a simple WordPress plugin which we will write very soon.
Actions
The fail2ban action you’ll use with these filters will largely depend on your configuration. Fail2ban ships with plenty of existing actions in /etc/fail2ban/action.d which can use your firewall to block IPs, send an e-mail, block requests in Apache and even Cloudflare.
However, in our case we have WordPress running behind Nginx, so we’ll write a new action which appends “deny” directives to an Nginx configuration file. The action looks like this:
[Definition]
actionstop  = echo "" > /etc/nginx/conf.d/fail2ban.conf
              nginx -s reload

actionban   = echo "deny <ip>;" >> /etc/nginx/conf.d/fail2ban.conf
              nginx -s reload

actionunban = sed -i "/deny <ip>;/d" /etc/nginx/conf.d/fail2ban.conf
              nginx -s reload
The action configuration should be placed in the /etc/fail2ban/action.d directory, we can call it nginx-deny.conf (that’s also going to be the name of our action). It also references a configuration file in /etc/nginx/conf.d called fail2ban.conf. This is an Nginx configuration file, which will contain our deny directives.
The Jail
The final piece of the fail2ban configuration is the jail. You can create a new configuration file in /etc/fail2ban/jail.d and call it wordpress.conf. Jails have plenty of configuration options which you can tune depending on your needs. Here’s our example section for WordPress authentication:
[wordpress-auth]
logpath = /var/log/syslog
enabled = true
filter = wordpress-auth
action = nginx-deny
maxretry = 3
findtime = 60
bantime = 120
This section tells fail2ban to watch the /var/log/syslog file, and use the wordpress-auth filter to determine when an authentication failure occurs. Using directives like maxretry, findtime and bantime, you can configure how often an authentication failure can occur, and for how long the IP address will be banned when that threshold is breached. In our example, we allow 3 retries in 60 seconds, and then ban for two minutes. The ban action is set to nginx-deny.
The pingback jail is fairly similar:
[wordpress-pingback]
logpath = /var/log/syslog
enabled = true
filter = wordpress-pingback
action = nginx-deny
maxretry = 2
findtime = 600
bantime = 3600
We’ll allow two pingbacks in 10 minutes per IP address, and ban the IP for an hour if that threshold is reached. Note that if you’re not using Nginx, you’ll need to set the appropriate action in both jails, to make sure you’re actually banning the IP.
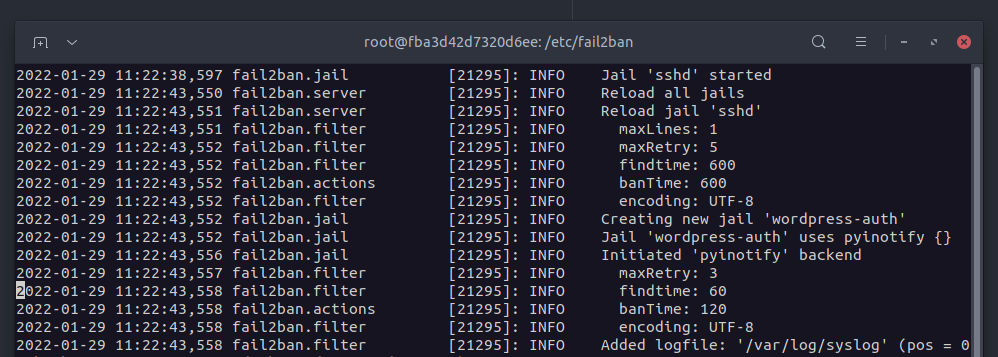
At this point you should restart fail2ban to make sure all these new configuration files are active. Watch the /var/log/fail2ban.log file for any errors, and make sure your jails are active.
The configuration for fail2ban is complete, however we’re still missing the WordPress configuration.
Configuring WordPress for fail2ban
At this point you might be tempted to install a fail2ban plugin from the WordPress plugin repository and call it a day. Please don’t. Unfortunately that’s not a great option. Even the most popular fail2ban plugin in the official plugin repository, used with DigitalOcean’s official WordPress image, is a terrible choice for various reasons:
- It’s over-engineered, outdated and insecure, can leak passwords
- Does not protect against attacks on application passwords in WordPress
- Seems to exist for the sole purpose of promoting the paid version of the plugin
We need a simple and lightweight plugin, which will log authentication failures and pingbacks to our syslog. Luckily, that’s not very complicated, so let’s create a new must-use plugin and place it in wp-content/mu-plugins/fail2ban.php in our WordPress install.
Here’s the full contents of the new plugin:
<?php
defined( 'ABSPATH' ) || exit;

// Log login failures
add_action( 'wp_login_failed', function() {
    syslog( LOG_WARNING, 'wp-login-failed:' . $_SERVER['REMOTE_ADDR'] );
} );

// Log application password failures
add_action( 'application_password_failed_authentication', function() {
    syslog( LOG_WARNING, 'wp-login-failed:' . $_SERVER['REMOTE_ADDR'] );
} );

// Log pingbacks
add_action( 'xmlrpc_call', function( $method ) {
    if ( $method === 'pingback.ping' ) {
        syslog( LOG_WARNING, 'wp-pingback:' . $_SERVER['REMOTE_ADDR'] );
    }
}, 10, 1 );
Might seem complicated at first, especially if you’ve never written a WordPress plugin before. We’re using WordPress actions here (not to be confused with fail2ban actions) to invoke the syslog() function on certain events: a login failure, an application password authentication failure, and a pingback XML-RPC call.
Each of these actions then writes that special string we’re looking for in our fail2ban filters, along with the user’s IP address.
Testing the Configuration
Open a new incognito browser window to your login page in WordPress, and try to login using invalid credentials. Look at the /var/log/syslog on your server, to make sure the attempt has been logged. Also look at the /var/log/fail2ban.log file to make sure it has picked up the authentication failure. Repeat the attempt a few more times, and you should see a 403 error, produced by Nginx.
If you found yourself locked out, you can ask fail2ban to unban your IP using:
fail2ban-client set wordpress-auth unbanip IP_ADDRESSYou could also test application passwords using this integration guide, to make sure that attack vector is also protected. To test the pingback routine (and authentication via XML-RPC) you could use a browser extension, such as XML-RPC Client for Chrome/Chromium.
Cloudflare and Reverse Proxies
If you’re using Cloudflare or any other reverse proxies or load balancers, you’ll want to make sure that the IP address that’s reaching your WordPress plugin is in fact the end-user’s IP, and the reverse proxy’s address, otherwise you may end up banning all traffic from that reverse proxy.
Cloudflare and other services will usually have lists of their IP addresses or ranges, which you can use in your web server configuration, to make sure the end-user IP is resolved correctly though headers like X-Forwarded-For. Here’s a guide on how to do this with Cloudflare, which has a section for Nginx.
Also note, that if you opt-in to ban the IP address with a local firewall (as opposed to using deny rules in Nginx), you may see unexpected results when working with a reverse-proxy, such as Cloudflare. This happens because even if the blocked IP address is the correct end-user’s address, the request will actually originate from Cloudflare’s IP, so the local firewall will let that through. This is why banning these IPs on the web server level (or at Cloudflare) is the better option.
Beyond Authentication
Fail2ban is flexible enough to handle a lot more complex scenarios than just authentication failures. The simple plugin we wrote that sends data to syslog can be extended to notify on other malicious activity:
- Captcha failures (if you’re using a captcha plugin)
- User/author enumeration and other common attack vectors
- Attempts to access common directories, like phpmyadmin, adminer
- DoS vectors via high-frequency search queries
- Dynamic image sizes DoS attacks
With corresponding fail2ban filters, you can prevent most of these types of attacks, assuming they’re originating from a single or handful of IP addresses. If you’re looking at a distributed attack, things can get a little trickier, and you’ll have to resort to other security tools and services.
If you’re looking to protect against some more advanced scenarios with fail2ban, we recommend learning about all its available features and configuration options. What we’ve shown in this guide is a very small fraction. The official fail2ban docs is a good place to start.
Fail2ban with Sail CLI
If you use Sail to install WordPress on DigitalOcean, the default configuration will already contain all the necessary plugins and config files to protect your WordPress install against password bruteforce attacks and pingback attacks.
If you ran a vanilla configuration with Sail, you can add fail2ban to your setup using a blueprint:
sail blueprint apply fail2ban.yamlThis will create all the necessary configuration files for fail2ban, install the simple syslog plugin for WordPress, and configure Nginx accordingly. This blueprint will also block excessive SSH authentication attempts, which is a great addition. Sail’s fail2ban configuration templates can be found here.